Image classify using own images with tensorflow
Introduction:
If you are the new user in tensorflow (just like me two weeks ago), you can see what is the fantasty feature in here
I have already test it:
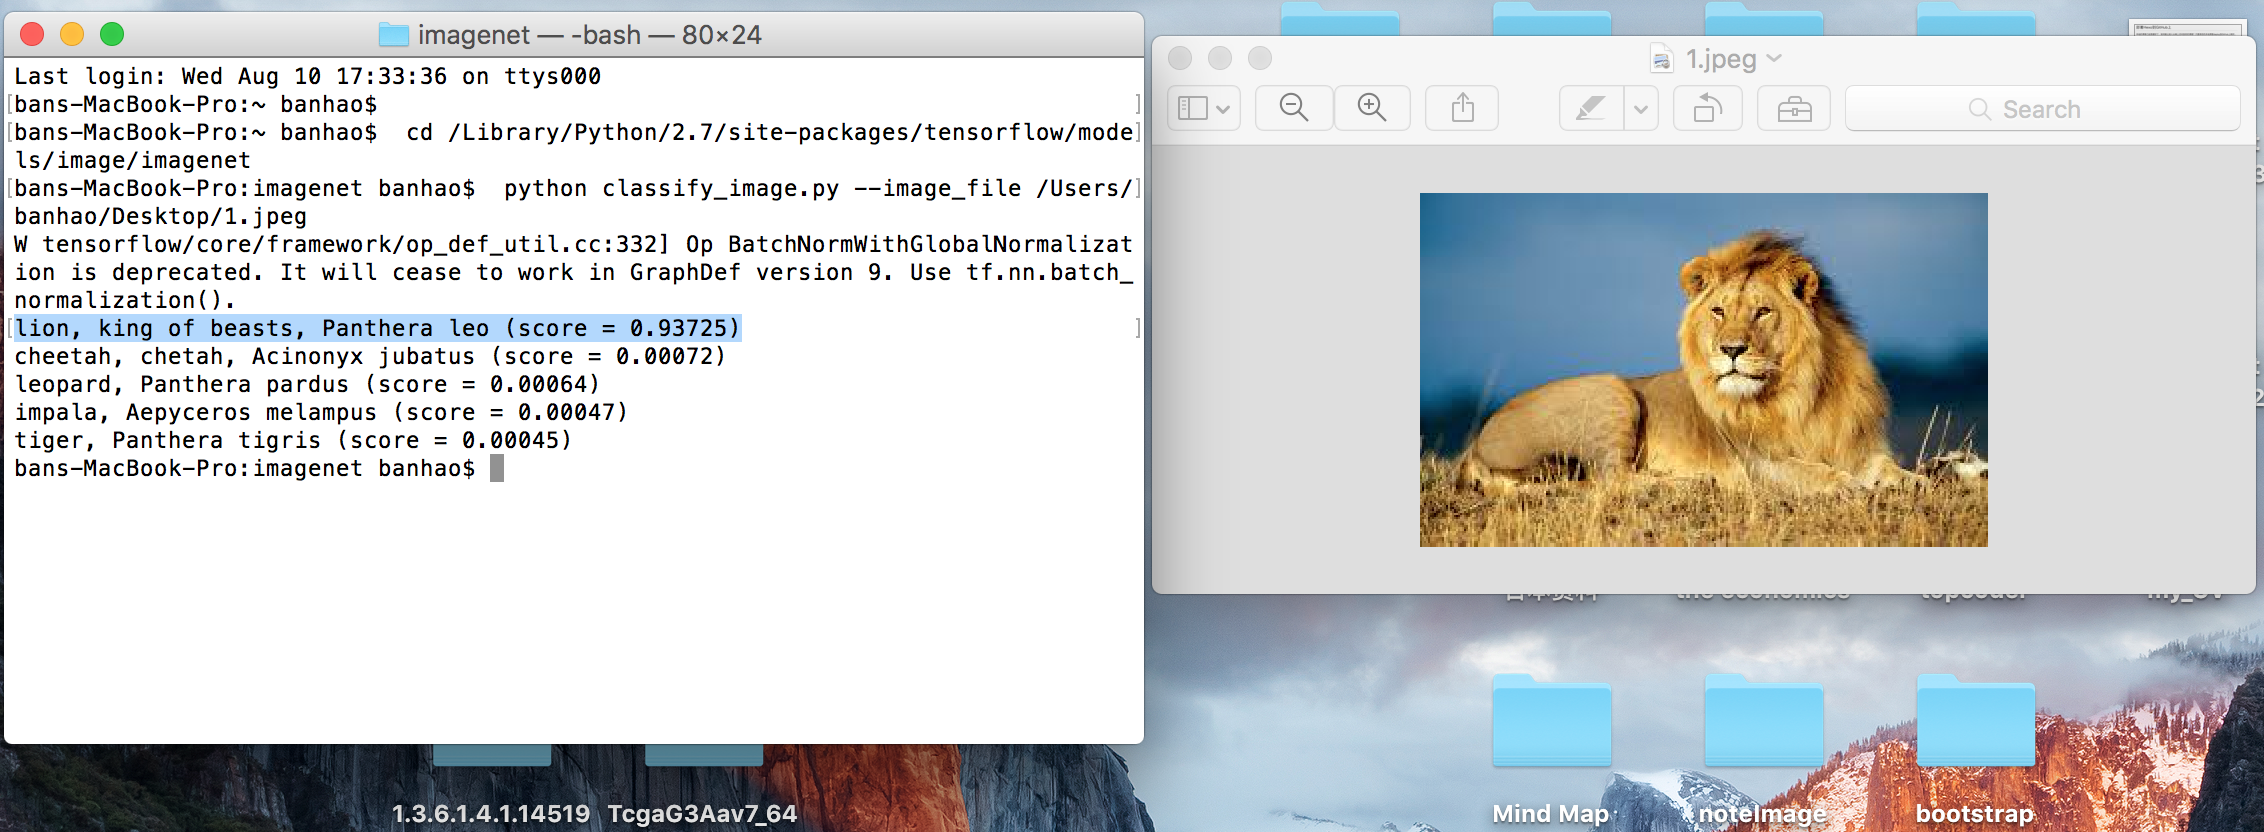
It is quit easy, just installed the tensorflow and see the website . Running at your terminal.
But how to input your own images and and output the possibility after training it.
So in this project, it will make a really simple demonstrate about it.
Main Idea:
This is about using your own images(JPEG or PNG) and created labels with tensorflow.
Steps for studying:
| Step | To do |
|---|---|
| 1 | Understand the key concepts |
| 2 | Understand the basic tutorial in Tensorflow(MNIST) |
| 3 | Modify the basic tutorial (MNIST) to output the prediction and each of the labels possibility |
| 4 | Reformat the images(JPEG or PNG) to the specification format |
| 5 | Using step three’s function to output the result |
Step One:
Using google or baidu or anything you can, try to search everything about the four key words that we will use in this project.
Key Concept:
- Deep Learning & Neural Network
- Softmax Regression
- Gradient descent
- CNN(Convolutional Neural Network)
Review:
Pleae use your own language to illustrate:
(If you can make the others who never hear these concepts to understand with a simple example, that mean you had already understand these.)
- What is the Deep learning & Neural Network
- How to create the Softmax Regression Model
- What does the Gradient descent usage doing
- Please make a simple demonstration to explain what is the CNN and what is the biggest feature of it.
Step Two:
Go to The tensorflow tutorial website and download the original the code and try to understand each of line.
You may follow some steps in here to understand more about the tensorflow
Step Three: Understand this example and edit the output as you wish
In this step, it is really important in this project and it will help you to understand what is the structure in the tensorflow.
At the beginning, I wanna use its own test data and output the possibility after I insert a test image. But I was totally no idea how to do it. But luckly, I found this blog: Using TensorFlow to create your own handwriting recognition engine. Thanks the writer(Niek Temme) who help me solved this problem. I just directly upload his code on this project. Above that, I add some functions in his source code to content with my demand.
The logical in the source core is quite sample, I will illustrate with the pseudocode and you may check the source code in
this file.
Create_model
|
|
Prediction
|
|
Prediction.predictini() :
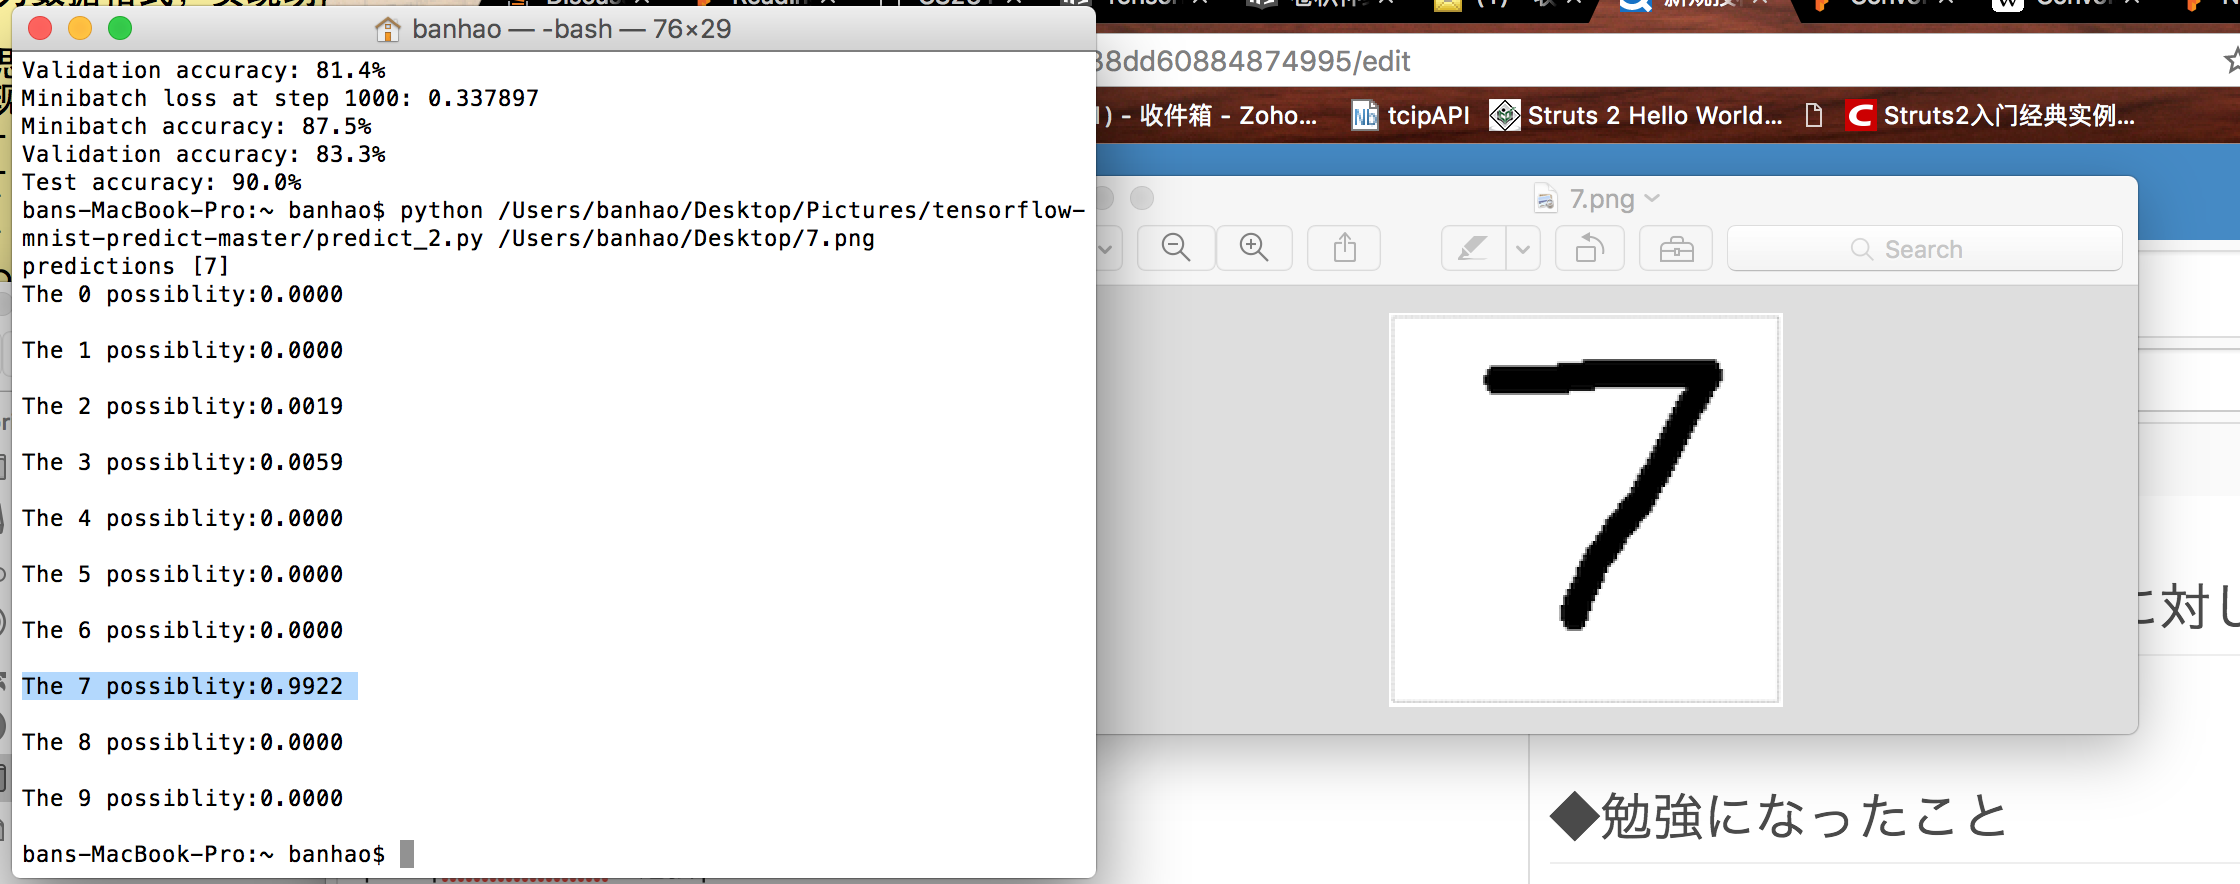
And the result will be like this :
Step Four:
In this step, you need to know the CNN and how it works.
Check this course to understand more about the CNN.
And check the assignment(‘Assignment one’ and ‘Assignment four’) in this course.
‘The assignment one’ are the great example to illustrate how to convert the images to the dataset and store into the .pickle file.
‘The assignment four’ give the example that how to set the dataset to the images shape. See the source code and you may understand.
‘The assignment one’ use these labels ={‘A’,’B’,’C’,’D’,’E’,’F’,’G’,’H’,’I’,’J’}. In each of the label, there are bunchs of jpg or png format on it. So you can change the label name to your label and put a plenty of the images on it.
Step Five:
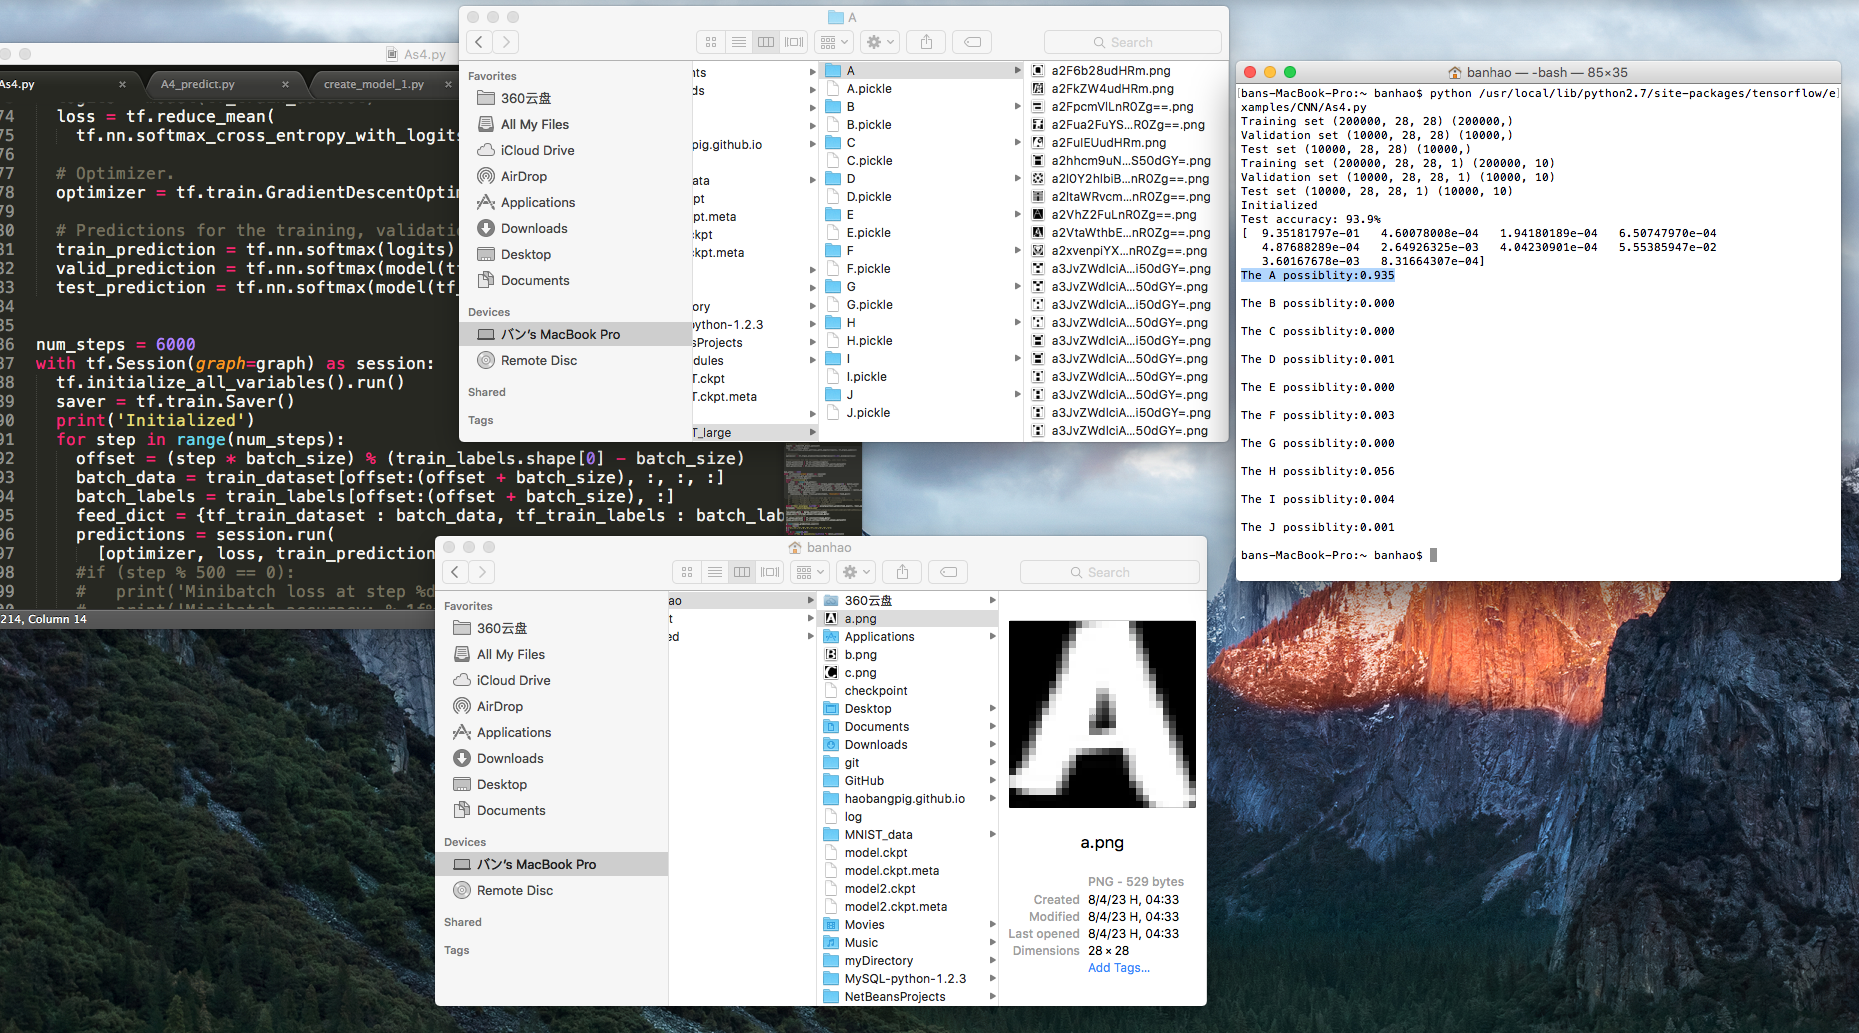
In this step, We just need to use the step three souce code and add them in ‘The assignment Four’. And we will got what we want.*
See the source code and you may understand it.
NOTICE:
-If you input a image that you wanna test, it may have some problems. If that happened, please use the imageprepare() function in step three to reformat the input image.
‘AS4.py’ will be trained the model each time when you running it and then test the input file(filename). So if you wanna test the simple directly, try to use the Saver() function to save as ‘.ckpt’ and retore it when you test the image(Like step three did).
Good luck for everything.
If you wanna contact me, try this way : haobangpig@gmail.com
